The stuff in bold is what I consider required.
Prerequisites
There are a few things that you should do before you set off. It’s tempting to skip these, but I guarantee that if you skip them all one of them will bite you.
- Plan the trip. That doesn’t mean that you can’t improvise, but it helps if you know in advance where you are going, what types of roads you’ll be on (freeways, back roads, unpaved roads or trails), and where the major towns are along your route, in case you need something.
- Check your bike. Things to check for:
- Are the brakes working properly?
- Is there enough oil in it? When did you do the last oil change?
- Are your tires ok? Enough air in them?
- Is there enough water in the radiator?
- Is the chain lubed?
- Are the fuel hoses ok?
- Any loose bolts?
- Let somebody know where you’re going. Just in case.
Necessary skills/knowledge
- How far you can go until you hit reserve. Try it once, range indicators are not too reliable.
- How far you can go from reserve until you run out. Make sure you’re carrying extra gas when you attempt this.
- How to read a map. Even if you have a GPS. GPSes fail, maps don’t.
- How to set up your tent. You must have done it at least once – just looking at the instructions doesn’t count.
- How to start your stove if you bring one. Stoves with liquid fuel typically have a multi-step starting sequence which you won’t figure out if you have never done it. Gas stoves are usually foolproof.
- What type of tires and tubes your bike has.
- How much pressure your tires need.
- Tubed tires only: how to change an inner tube. You MUST have done this at least once, or you won’t be able to do it on the roadside. Knowing how to change a bicycle tire does not count.
- Tubeless tires only: how to plug a hole.
- How to adjust your clutch and brakes.
- How to replace the headlight and the brake light on your bike. Bonus points for turn signals.
- How to tighten your chain.
- How to clean the air filter.
- How to change a broken fuel hose.
- If your bike has a vacuum petcock (it probably does), know what each of the three lines going to it is for.
- How to clean/change a spark plug.
Stuff for navigation
- Paper maps of all the places you want to go to. Much nicer for route planning than a GPS, and provide a backup in case the GPS fails.
- A compass.
- A GPS with the right maps. Extra batteries are a good idea in case there’s a problem with the GPS mount.
- Pen and paper to write down directions given to you by locals.
Motorbike gear and tools
- The OEM toolkit is a good starting point. There’s a reason for each tool in there. Replace them with better/different tools as you like.
- A pair of pliers which can also cut wire. Angled needlenose pliers with an integrated wire cutter are the best.
- A flathead and a philips screwdriver.
- Any allen keys or torx keys needed by your bike.
- Zip ties.
- Duct tape.
- Bicycle pump, or CO2, or portable compressor running off the bike battery. I like the bicycle pump because it’ll always work and is light, small and cheap.
- Stuff you need for a tire change (tubed only):
- Whatever wrenches are necessary to remove the wheel nuts. Don’t get the extra short wrenches, the wheel nuts can be a bitch.
- 3 good tire irons. 2 work in a pinch, but you need 3 to do a proper job. The difference between good tire irons and crappy ones is huge, get the good ones.
- A 12 mm wrench for the valve nut. An adjustable wrench or a pair of pliers may not not fit in-between the spokes.
- A can of WD40 to lubricate the rim to get the tire on and off. Makes all the difference. Soapy water is technically better, but WD40 also has other uses. Make sure you don’t get any WD40 on your brake disc.
- A spare inner tube. Ideally one for the front and one for the back. A front tube can be used in the back – it’s too big, but it’ll do the job for a while.
- A way to lift the front or rear wheel of the bike. Rear wheel can be done with the center stand if your bike has one. I have the “Enduro Star trail stand”, a clever little stand which can be used to lift either the front or the rear wheel, and it works great. In a pinch, sticks and stones work too, or you can lay the bike on its side, but it sucks.
- A valve core remover makes getting the air out a lot easier.
- A bicycle tube repair kit if you flat a second time.
- Stuff you need for a tire change (tubeless only):
- A tire plug kit. I have never done this personally, so maybe I’m missing something here.
- A few different sized hose clamps. Many uses.
- Some wire. Useful to fasten stuff which can’t be done with zip ties (e.g. stuff that gets hot).
- A small can of WD40.
- A piece of fuel hose (1 m should do). Can be used to replace broken fuel hoses, siphon fuel etc.
- One of each light bulbs of your bike.
- Spark plug and spark plug tool.
- Pressure gauge if your pump doesn’t have one.
- A 5 m rope which is strong enough to tow your bike. Does double duty as clothesline, to replace broken luggage straps, or to hang your food from a tree if you camp in an area with bears.
- For longer trips: a can of chain lube. WD40 is not chain lube, it will in fact remove lubricant from your chain.
- An old rag.
- A ziploc bag with wet wipes. They work great to take grease off your hands.
Camping gear
- Tent. 1-person tents are really really tiny. Get at least a 2 person tent – the weight difference is minimal, but there will be enough space for your gear inside. Make sure you have dedicated footprint or a tarp to put underneath the tent – it will keep your tent cleaner and make it last much longer.
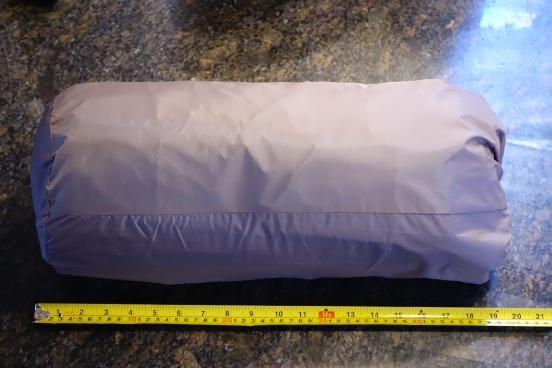
- Mat. Inflatable mats pack smaller and are more comfortable, but cost more and become unusable when they get a hole. Foam mats are bulkier and less comfy, but cheaper and indestructible.
- Sleeping bag. Down bags are smaller, lighter and warmer, but they cost more, lose their insulating properties when they get damp, and need to be dry cleaned. Synthetic bags are bulkier and don’t keep you as warm, but work fine when damp and can be washed in any washing machine.
- Head lamp with extra batteries. A head lamp is way better than a regular flashlight – you have both hands free which you’ll need if you e.g. need to set up your tent in the dark. Keep it in a designated and easily accessible place. You don’t want to dig through your bags after rolling into camp after dark.
- Extra tarp, to cover things, put on the ground, etc. I very highly recommend this in bad weather. Any cheap tarp from the hardware store will do.
- Small towel. Camping stores sell special “camping towels” or “travel towels” made from fancy material which are almost as good as a normal one but take up less space and dry faster.
- Earplugs.
- Mosquito repellant.
- A couple of plastic bags. They are useful for many things.
- If you want to cook:
- Stove. Most liquid fuel stoves can run off the same gas as your bike. That’s where the hose to siphon gas from the tank comes in. Propane/butane stoves are easier to use but require special cartridges which may not be available everywhere.
- A lighter or matches to start the stove. Even if your stove has an automatic start, they tend to fail.
- At least one pot.
- A cup to drink from. There are good unbreakable plastic cups with a handle and measurement markers at every camping store, which are great for coffee, soup or measuring ingredients.
- A fork, knife and spoon. The cheapest ones from your local discount store are also the lightest ones because they’re made from the thinnest material. Or you can buy a $29 titanium spork from a camping store, which is going to be much worse than a separate fork, knife and spoon.
- A small wooden or plastic spatula or spoon to stir.
- A plate if you don’t want to eat from the pot. There are special and expensive “camping plates” at every camping store, but a solid plastic plate from a takeout will do the same job. A deep “soup type” plate is more useful than a flat plate.
- Salt, pepper, sugar.
- Oil. Fancy olive oil goes bad, cheap vegetable oil last a long time. You’re not going to cook a Michelin star menu on a camping stove anyway.
- Hot sauce, chili flakes, whatever other spices your palate demands.
- A small amount of dish detergent. A mini shampoo bottle from a hotel makes for a great dish detergent container.
Miscellaneous stuff
- Water bottles. Transparent plastic bottles with a wide mouth are best. They’re easier to clean than the ones with a small opening, and they can be filled with ice at fountains of fast food restaurants.
- For tours off the beaten path, into the desert, or if you want to cook, a water bag. They pack down to nothing but can transport a lot of water.
- A first aid kit.
- A roll of toilet paper in a ziploc bag.
- A knife or multitool.
- For very remote tours: a PLB or similar device (a phone sized device with a button – when you press the button, it alerts emergency services from anywhere in the world). This also works when there is no cell coverage. Put it somewhere on your body (e.g. jacket pocket) – you may not be able to walk to the motorcycle when you need it.
- A way to purify water. There are generally two different systems which are useful for motocamping:
- Water purification tablets. You put a tablet in a water bottle, wait half an hour, and it’s ready for consumption. There are many different types which are active against different types of bacteria and viruses, but in general the stronger ones contain chlorine which makes the water taste like a swimming pool. I use tablets because they’re cheap, small, and on most tours I don’t end up needing them.
- Various types of filters. There are some which work with gravity, some with pumps, others which filter the water while you drink it. There are ceramic filters and charcoal filters, which do different things. Prices and effectiveness vary wildly, do your own research.
- A camera. I find a point-and-shoot to be more practical than an SLR because you can’t easily put an SLR up to your eye with a full-face helmet on. Remember that camera touchscreens do typically not work when you are wearing gloves.
- A book for downtimes.
- A tablet or small laptop – much nicer than a phone for looking at google maps, yelp, wikitravel etc. If they connect to your camera, you can use them to upload pictures of your trip to facebook and make your friend envious.
- Pen and paper.
- A small amount of shampoo – does double duty as soap etc. A tiny shampoo bottle from a hotel is perfect.
How to pack
How you like to carry your stuff is pretty personal and there is no best way. I can only talk from my personal experience, make of that what you will:
- Tank bags are very handy for stuff you need to access often, like maps, wallet, phone and earplugs, but they often get a little in the way when you want to move around on the bike (e.g. for trail riding).
- Tail bags have a high center of gravity and make it annoying to get on and off the bike, but they don’t add to the width of the bike, which makes them great for riding narrow trails.
- Saddle bags have a low center of gravity and lots of space, and make it possible to add more stuff on top, but they make your bike wider.
- Waterproof bags are also dust proof, which makes them very good for the desert.
- Backpacks suck for long rides, especially heavy ones.
- Hard luggage is much easier to pack and unpack than soft luggage, but I’d rather hit a tree with a soft bag which will move out of the way than with a metal box which will bend or make you crash.
I usually use a tank bag, a 30 L tail bag and sometimes a second bag strapped to the passenger seat. All my luggage is waterproof.
Food which is easy to pack
Some food which is easy to pack, won’t go bad quickly and can be prepared easily in a camping setting:
- Oatmeal.
- Trail mix.
- Cereal bars, energy bars.
- Hot dogs or other sausages which can be boiled.
- Hard sausages (e.g. Salami), beef jerky.
- Canned beans, canned ravioli, canned anything pretty much. Remember to bring a can opener. If you forget, you can open a can by pounding a screwdriver into it with a rock, but it’s not pretty.
- Pasta, ramen noodles.
- Rice.
- Hard cheese.
- Bread. Pita bread or tortillas are flat and easy to pack.
- Tea, instant coffee, gatorade powder.
- Bananas, oranges anything with a peel basically comes in its own packaging. Put them in a plastic bag, fruit can liquefy with enough heat and vibration.
- Nutella, peanut butter.
Some people like various “ready meals” or “emergency rations” – I have no experience with them, but people like them for their convenience. Many of them require the ability to boil water.
But I only want to go on well frequented roads!
You can of course bring and do everything anyway – it won’t hurt you. You’ll still need the same camping stuff, but you’ll be able to get help if anything with your bike goes wrong.
My personal experience is that calling AAA, getting towed to a shop, and having your problem fixed can take half a day, especially on weekends and holidays. I can fix most problems with my bike in less than that, so I’d still bring most of what I listed earlier.
Things you can skip if you don’t have them / don’t want to bring them:
- You’re less likely to puncture your tires, and you won’t have to fix them yourself, so you can skip that. I’d still bring a pump – sometimes you have only a small leak, and the ability to pump it up every half hour until you are at the next shop can be useful.
- You will probably not need water purification tablets.
- You won’t need a PLB, tools to change a spark plug, a tow rope, or extra fuel hose.
- You might be able to skimp on maps because there will be someone to ask for directions.
Addendums
This section contains various addendums related to specific items. Feel free to skip this part.
Addendum 1: Recommended brands/products
This is purely based on my own experience. I have personally used all of the items/brands listed here, and recommend them.
There are many other products which may be equally good or better, but I may not have used them or forgot about them. Don’t despair if your stuff isn’t listed here – this is just intended as a starting point if you want to buy stuff.
- Luggage: everything made by Wolfman is excellent. The Wolfman Expedition line is waterproof, very sturdy and made in the USA. It’s not the cheapest though.
- GPS: Garmin Montana is excellent. The AMPS rugged mount is solid and won’t drop your GPS even when you do a jump.
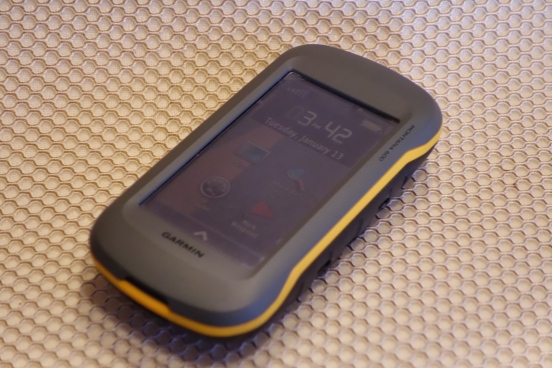 Garmin Montana 600
 - PLB: ACR ResqLink. It’s small, has a good reputation and seems to be very well made. I haven’t needed to call emergency services, so I can’t say how well it works. The same company also makes EPIRBs (PLBs for marine use) which have been used around the world for decades.
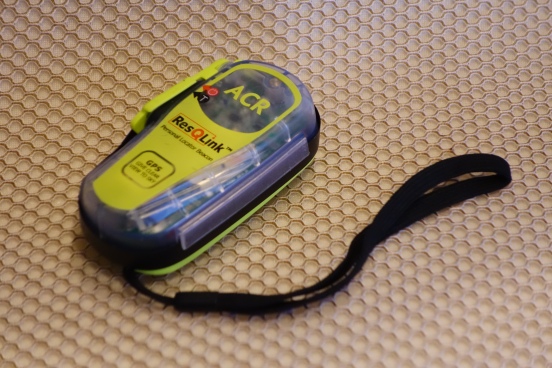 ACR ResqLink
 - Tools: anything from proper tool companies (i.e. not a store brand). I prefer tools which aren’t made in the far east because they usually aren’t that great. Good brands include Craftsman, Tekton, Wiha, Wera, GearWrench, Motion Pro. There are many others.
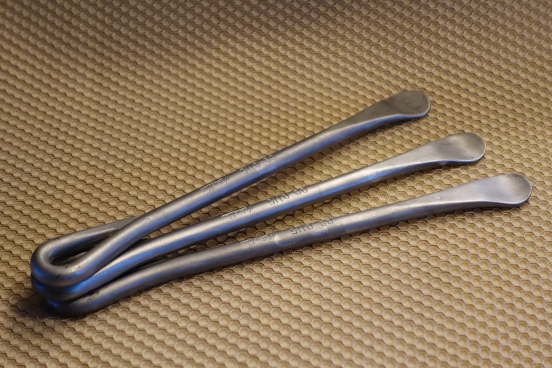 High quality tire spoons from Motion Pro
 - Knives and multitools: generally the really small ones or the ones with too many implements suck. I’m a bit of a knife and multitool aficionado, and have had many different ones. For multitools, go with Leatherman, and for pocket knives with various implements, go with Victorinox. As of 2015, the Leatherman Charge is hands down the best multitool ever made. The Victorinox Swisstool comes close but is heavier and harder to operate one-handed. For pocket knives, nothing can beat the new large one-handed Victorinox knives (e.g. the Victorinox Forester one hand).
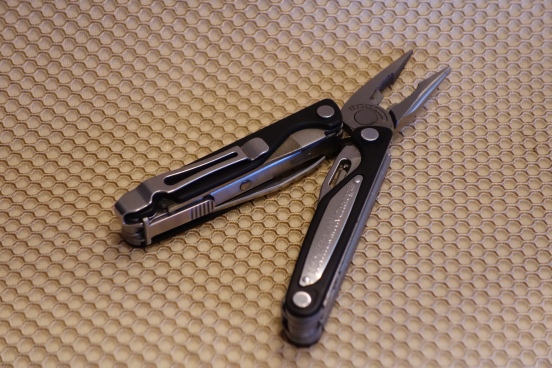 Leatherman Charge ALX
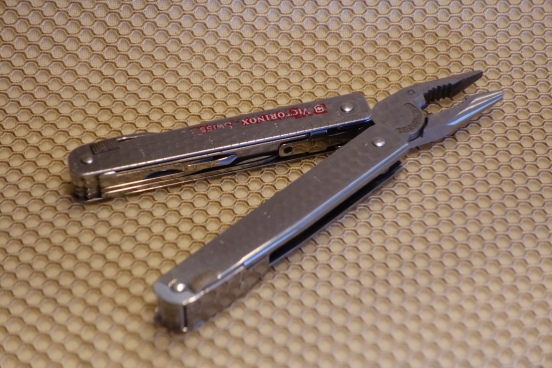 Victorinox Swisstool
 - A special shout-out to the Endurostar Trail Stand. It’s a nifty little tool which will help you lift your front or back wheel, even if your bike doesn’t have a center stand. It’s basically a telescopic tube with a foot on one side and a hook on the other. You use the side stand of the bike as one leg, and the trail stand as the other.
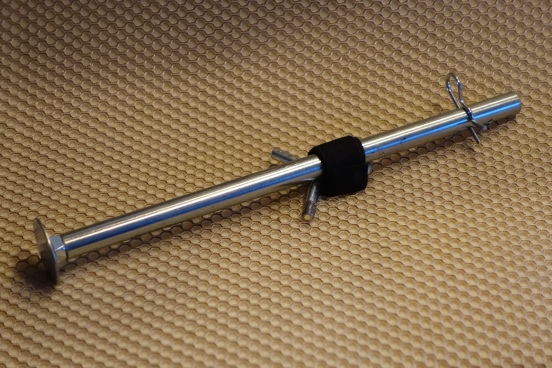 Endurostar Trail Stand (disassembled)
 - I have the Swedish-made Primus Omnilite Ti liquid fuel stove which has accompanied me on many travels and never given me an issue. It’s very expensive though. For propane stoves, I have heard great things about various MSR stoves, but don’t have personal experience with them.
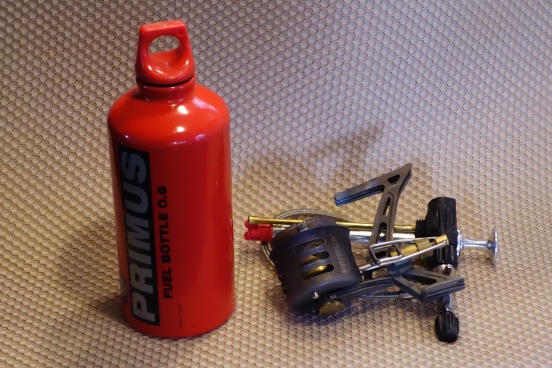 Primus Omnilite Ti with 0.6 l fuel bottle
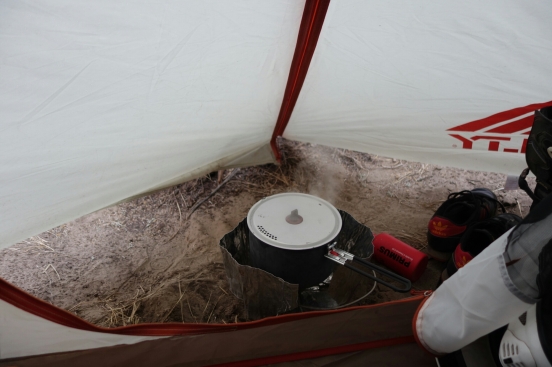 The Primus stove in action somewhere in Nevada – here with the smaller 0.3 l fuel bottle
 - Tents: anything sold at REI or any proper camping store will do the job. Don’t buy the $29 tent from Walmart, it will suck and break soon. Avoid the very expensive “ultralight” tents – they are less durable than the regular ones because they’re made of thinner material. Expect to spend at least $150 for a good 2-person tent. For one person, I highly recommend the Kelty Salida 2. It’s marketed as a two-person tent but it only fits one in comfort. It’s simple, cheap but of good quality.
 Kelty Salida 2 with footprint, extra tarp, more stakes and more guylines
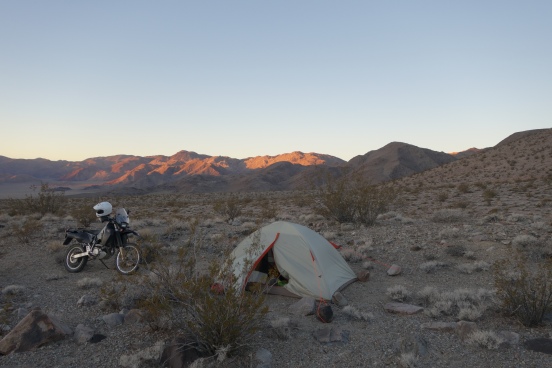 The Kelty Salida 2 in action in the Death Valley
 - Sleeping bags: again, anything sold at a good camping store will do the job. Expect to spend at least $100 for a synthetic bag, or $200 for a down bag.
- Mats: foam mats are all the same, with exception of the Thermarest Z-Lite, which has a very nifty design which allows it to fold smaller than other foam mats (this is what I use). They’re pretty cheap. Inflatable mats come in many different styles and cost way more. Good brands are Exped and Thermarest.
- Bicycle pumps: I used to cycle a lot and have used many different bicycle pumps. Avoid the “super small” or “super light” pumps like the plague, they barely work for bicycles and certainly not for motorbikes. Ideally you want the largest pump you can carry, and you want one which has a hose going from the pump to the valve (i.e. which does not attach to the valve directly). The ones which attach to the valve directly are a gigantic pain in the ass to use. A t-handle helps a lot with pumping. The best I have found is the Topeak Turbo Morph with pressure gauge – I have used it for everything from bicycle to car tires. It takes about 10 minutes of maximum effort pumping to fill the rear tire of a DRZ with it. Important: bicycles come with two different types of valve, “Presta” and “Schrader”. Schrader is the same as a car or motorcycle valve, Presta is something else. Most bicycle pumps can be converted by turning around a gasket in the part which attaches to the valve, but not all. Make sure you get one which works for Schrader valves.
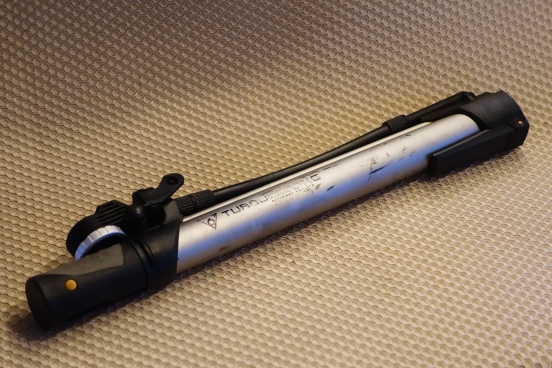 Topeak Turbo Morph with pressure gauge
 - Water bottles, plastic containers etc: everything made by Nalgene is good and reasonably priced. The Nalgene cap thread is an industry standard, and many water filters will screw directly on a Nalgene bottle.
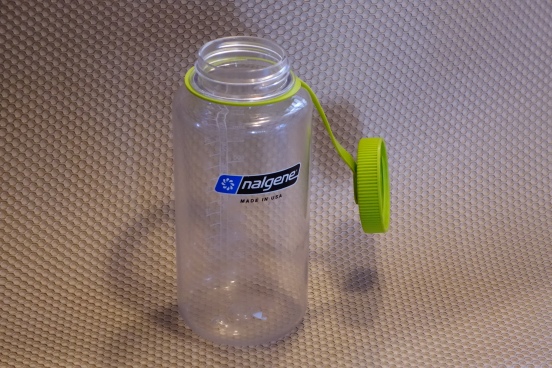 Wide-mouth Nalgene bottle
 - Water bags: MSR dromedary is great and won’t break easily.
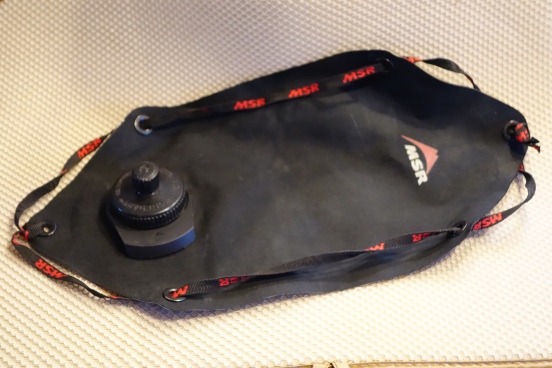 MSR Dromedary water bag (4 l)
 - Water purification: I have used the Katadyn Micropur Forte tablets several times and never got sick. They make the water taste a little bit like a swimming pool though.


Addendum 2: Things that you do not need
- I have negative experience with Slime (the stuff you put in your tire to seal leaks from the inside). It’s heavy, expensive and not guaranteed to do the job, so you’ll need to bring a spare tube anyway. I would not buy it again.
- Storm matches, special waterproof lighters, magnesium fire starters and the like. Just put a cheap lighter or a box of matches in a ziploc bag. Bring 2 if you’re really worried. Also remember that you have a full tank of gas – if you have a hose, you can siphon some out and use it to start a fire. Just make sure that your gas cap is back on before lighting anything :-)
Addendum 3: PLBs, Satellite messengers etc
Many people like to carry a PLB or satellite messenger when going to very remote areas.
Essentially, a PLB or satellite messenger is a phone-sized device with a button on it. When you press the button, it sends out a signal calling for emergency services. This is not to be used if you run out of gas or have a flat – you’ll get a very hefty fine if you do that. This is for when you fall off a cliff and break your leg, and nobody’s there to help you.
Essentially, a PLB or satellite messenger is a phone-sized device with a button on it. When you press the button, it sends out a signal calling for emergency services. This is not to be used if you run out of gas or have a flat – you’ll get a very hefty fine if you do that. This is for when you fall off a cliff and break your leg, and nobody’s there to help you.
PLBs and satellite messengers are not the same. They do a similar job, but work very differently.
PLBs are simpler and older technology. They are mainly used in ships and boats (where they are called EPIRBs).
- They send out a distress signal to a specialized satellite network. This is monitored worldwide by various government agencies. This signal will tell emergency services roughly where you are.
- They also send out a radio signal which will be used to find your exact location once the emergency services are in the area.
- They do not allow you to send any custom messages – it’s just “SOS”.
- They do not rely on networks run by private companies.
- These do not require any subscription. It’s a buy-once product which will work for years at no additional cost.
- Some companies offer limited additional functionality (like “I’m OK” signals) at additional cost.
Satellite messengers are essentially satellite phones without a phone. When you press the button, they send something similar to a text message to a service center.
- They rely on satellite phone networks, and do not have worldwide coverage – check the coverage maps of your provider.
- The service centers are run by private companies (typically the company you buy the messenger from), which will then alert emergency services.
- They require a paid subscription.
- The main advantage is that most of them allow you to also send non-emergency messages – you can e.g. send an “I’m fine” message to your spouse, update your facebook feed, or send text messages. Functionality and pricing varies depending on brand.
To sum it up: PLBs rely on a more reliable network, cost less in the long run, but are less flexible in what they can do. Satellite messengers are less reliable, cost more, but allow you to do more communication than just “SOS”.
Popular PLBs include products from ACR Artex. Popular satellite messengers include products from Spot and DeLorme.
PLBs are usually around $250 and need to be serviced every 5 years for about $150.
Satellite messengers are usually $100-$400 depending on functionality, and require subscriptions which can go anywhere from $100 to $1000 a year, depending on features offered.
Comments